Monday, April 25, 2011

Helping Peoples Grad Films

I like modeling in 3D more than anything else so the jobs I took to help other people is mainly that.

I took up Julies request quite early on as the modeler for her character Lumiere. It took a little while to model because of the gear complexity in the back but it was quite nice in the end.

I also help Paige out by modeling an orrey for her

Lastly I created one of Salvador's backgrounds.

Playing with Water

Unfortunately a large portion of my grad film will include water, more specifically the ocean. At this point in time i don't even know how to approach this. This pretty much covers one of hardest possible areas of 3D. Simulation of fluids is hard in every definition of the term. However, there are a few ways to create water.

1. To actually simulate water with millions and millions of particles (very time consuming) in a program such as realflow, and then shade and render it in Maya. Great thing about doing it this way Is it allows for realistic interaction between the fluid and other objects in the scene. However I haven't got a clue on how to approach this.

2. Use the Maya ocean shader, which despite its complexity is actually quite fast to render. It is feasible to use for animation however there are quite a lot of few issues i have to contend with in order to make this work.


test1: this is pretty much stock settings but i did adjust the shader a bit, but as of right now neither the animation nor the shading is very convincing.


test2: the animation is a bit better but the shading of it is going to be a huge problem from what i can tell.

The problem with water is that, for it to look convincing it needs to take in the reflection and refractions of all the surrounding objects and environments, not to mention interact with objects in the water. This shader, from what i know can't really do that, but it's too early to say since it is still new to me.

Another problem is that this shader doesn't work in V-ray, which isn't too big of an issue.

3. To use a combination of displacement maps and bump maps in order to achieve water. This will work on any rendering engine, but again interaction with this method is impossible.
An important thing to remember when working with this method is that you must use either the mia material or vray material, which are both physically accurate, and one of the reason for this is because it allows for fresnel reflection. This is to simulate a reflective quality found in dielectric materials such as water or glass where the the reflectivity of a surface will change depending on the angle being viewed. I feel that this might be the easiest way to make an ocean, but as of right now I just don't know enough about all of this to make any conclusions about what i should use.


To create the ocean i want will undoubtedly be a very big challenge. I need to look into techniques regarding this. At worst I think I should limit the water I use in my grad film.

Sunday, April 24, 2011

DJ Whitesmith New Album

Dj Whitesmith
We all Victims (2011)
TrackList:
01. The Gre at Collapse (Intro)
02. Piano In The Dark
03. Missing Day's Music fe at. Speech Debelle, Sta c
04. The Delta (Album Ver.)
05. Yes fe at. Manafest
06. Algernon Supernova
07. DIA fe at. Melodee
08. Detoxify Mad
09.Homare fe at. Shing02
10. KIEL
11. The Defender feat. Nanorunamonai, Meiso
12. Gio (for HIMEYURI)
13. Gone
14. Rumina (Saga Ver.)
15.Street Symphony No 2


I am very excited about his first album. I have been a fan of his music for sometime now. Will be listening to this constantly.

Creative Explorations Project

For this Creative Explorations Project we were told to go to any part of Granville Island and sit for a good 5 minuets and record all the experiences you felt, heard, and saw. We were to present our list back in class and then trade with another person. Using their list we were asked to recreate another list based on what we imagined. This happened once more. Lastly these lists was placed in a hat to be drawn randomly by each person.

In the end I received Alex's list.

We then each created a soundtrack based on what we read in the list.
My Sound File

However I liked the soundtrack produced by Chloe Ezra more and I used that as the beginnings of the creative explorations project.
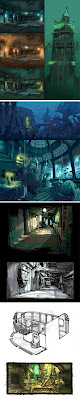
Chloe's Soundtrack

When I heard of the soundtrack it immediately reminded of a popular game "Bioshock" which featured a underwater retro city overrun my monsters. The soundtrack reflected not only the time period but also the desolate and dark feeling of the setting. I took inspiration from the game and decided that I will create and light an environment which reflects the soundtrack.

I then gathered some reference images from Bioshock. This was straight out of the Bioshock artbook, and it includes among various goodies, the environmental conceptual art which i need.

Then I quickly modeled and blocked out some concepts of what the environment should look like.

a couple to list:
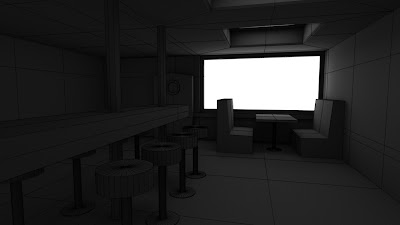
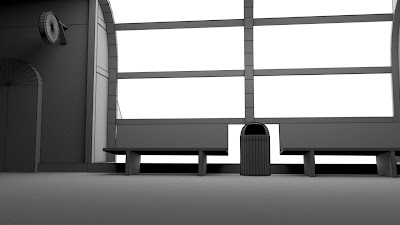
After a while this is what i decided upon:

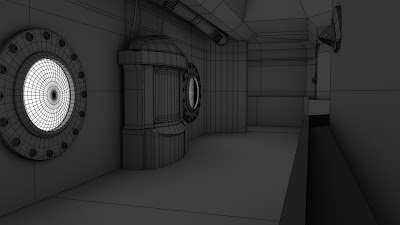
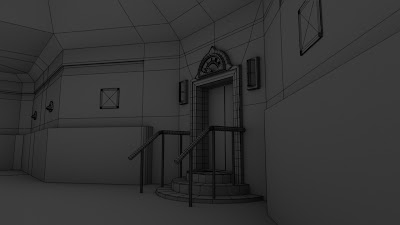
(Maya 2011, Mentalray, Photoshop CS5)
With everything modeled I needed to start texturering. I've contemplated using zbrush for this aspect of the project, but I didn't really like the painting features of zbrush all that much. So I decided to try Mari just to expand my horizon.

There was a lot of things i like about Mari and there were just as many things i didn't like about it as well. The biggest problem i had with working Mari is that the program cannot clear the history, as a result it fills the ram almost instantaneously. When working on 2k+ textures it can be frustrating having to restart the program every-time the ram fills up. otherwise Mari did a wonderful job.

Example of a texture:
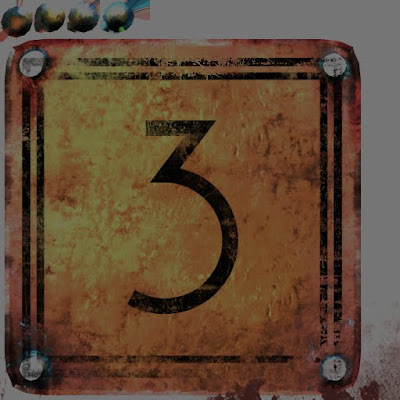
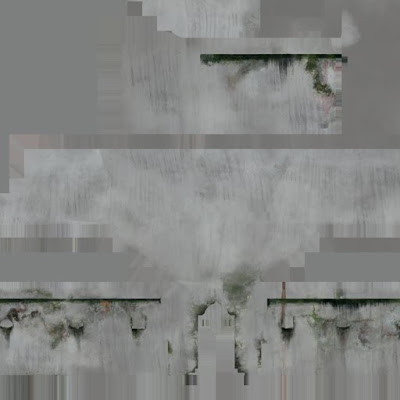
Could have made the wall texture more efficient but ah well.

With that done, it is onto lighting.

Lighting was very difficult to learn. Firstly the better lack of online resources makes it very challenging to figure how some light settings interact with mental ray. Secondly mental ray is trying to integrate as much as it can with the stock Maya lights which results in a very awkward lighting setups. For example if you have the physical light shader attached to a spotlight the normal controls and the shadows tab is disabled, and things like light intensity and shadow softness is controlled through the new shader node. It is very unintuitive. This becomes even more confusing and frustrating when GI and FG is enabled. Of course all this round about method of lighting can be avoid by switching to Vray but sheer mount of options of mental ray still quite appealing.

Some Final Renders:

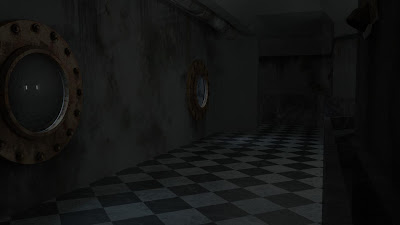
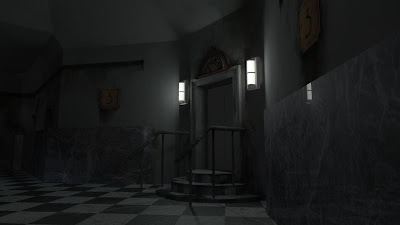
Overall it was an interesting and challenging project. Lighting and mental ray is still unfamiliar territory but i think i have a little better grasp of things.

Revamp for as Production Blog

Okay, after a little bit of digging I managed to find and salvage this old forsaken blog that was created around my highschool years for English 12. I guess the name "The Lost Archive" is half appropriate now.

This will be turned into a Production Blog necessary for Advanced Research and Development course at Emily Carr, and will host many things that people may or may not have seen during the development of some of my projects.

Enjoy the Ride.